Life's Ride!

En veetu samayal.com

For my people will live as long as trees...For they are people blessed by the Lord,and their children too, will be blessed. I will answer them before they even call to me. While they are still talking about their needs,I will go ahead and answer their prayers! Isaiah 65:22-24

Monday, December 19, 2016

Khara kozhukattai ( Savoury steamed rice dumplings)


Khara kozhukattai ( Savoury steamed rice dumplings)


Sunday, May 13, 2007


Khara kozhukattai ( Savoury steamed rice dumplings)


I remember my mother's prayers and they have always followed me. They have clung to me all my life. -- Abraham Lincoln

Gnyabagam varuthae ( Autograph) is a song which tamilians all over the world can identify with!


A special mother's day song Amma endru ( Mannan)!:)


Khara kozhukattai ( Savoury steamed rice dumplings)


It was only recently that the well known Adyar Anand ha Bhavan opened shop in my hometown. And one of their specialties were these savour y steamed rice dumplings. My mom loves this dish & each time she goes there, be it for breakfast,lunch or dinner, she never fails to order these dumplings. As for my dad, it is ' whats so great about it!its just another form of uppma!'. Even though she loves this dish , she never makes it at home! Reason is since dad doesn't like it , she isn't that interested in cooking it just for herself! So for this mother's day i thought of cooking this favourite dish of hers as a visual treat for her! My recipe is not an authentic one!I have just tried to recreate the recipe based on my memory of this dish!


Recipe:

Rice rawa - 1 cup, mustard seeds - 1 tsp, dry red chilli - 1, broken, chana dal - 1 tsp, urad dal - 1 tsp, asafoetida - a pinch, fresh grated coconut - 3 tbsp, curry leaves - 7, shredded, salt to taste, oil - 3 tbsp, cumin seeds - 1/4 tsp,green chilli - 1, finely chopped, cashewnuts - 8,chopped.


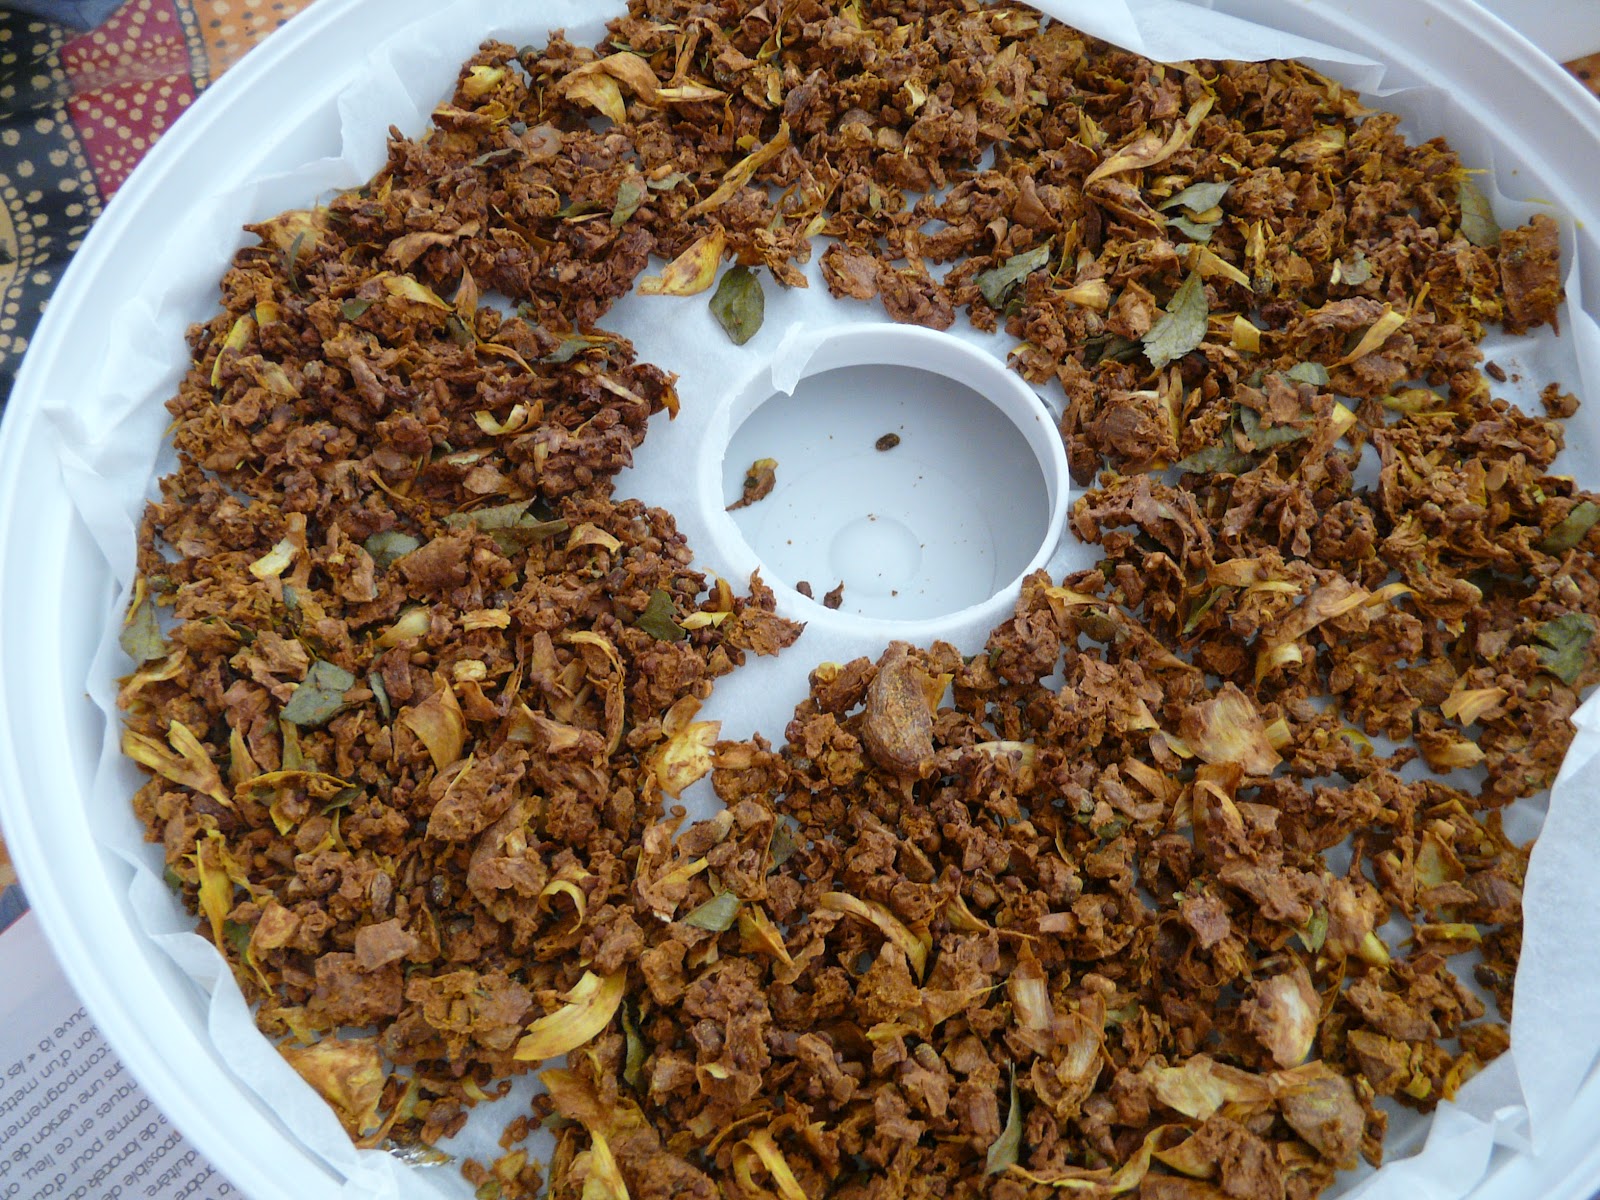
Heat oil in a pan & season it with mustard,urad dal, chana dal, cumin, red chilli, green chilli& asafoetida. Add the grated coconut, salt ,cashewnuts& ri ce rawa & sauté for a minute or two. Pour in 2 1/2 cup of water & cook till done. Now make small balls of this cooked mixture & steam ( like you do for idlis) for 12 to 14 mins. Serve with coconut chutney.They also can be stored in the fridge for a day or two!

Normally this dish is prepared with raw rice , but since i had some parboiled rice rawa on hand i used it to prepare the kozhukattais. You can also cook the rice uppma directly in the pressure cooker . In Bangalore during the averakkai season, the m aamis used to prepare this kozhukattai with fresh green averakkai. Try cooking it with fresh averrakai ,real delish & pass me the authentic recipe if possible,for i would love to try it out too!;))


Bonne fête Maman!:)

YOU WERE THERE...
You were there when we took our first steps,
And went unsteadily across the floor.
You pushed and prodded: encouraged and guided,
Until our steps took us out the door...
You worry now "Are they ok?"
Is there more you could have done?
As we walk the paths of our unknown
You wonder"Where have my children gone?"
Where we are is where you have led us,
With your special love you showed us a way,
To believe in ourselves and the decisions we make.
Taking on the challenge of life day-to-day.
And where we go you can be sure,
In spirit you shall never be alone.
For where you are is what matters most to us,
Because to us that will always be home...
~Author Unknown~

And some cake to go with my khara khozhukattais!ENJOY!!:))

 /
Edited to add: This post was first published for mothers day in 2007. Reading this post today is making me all teary eyed, for my amma is no longer with me and i miss her in all the little things of everyday life. She taught me the basics of cooking and loved to hear about the recipes published here.


Imiss you amma

Falooda

WEDNESDAY, NOVEMBER 12, 2008


Falooda


Falooda
Another recipe which is synonymous with Indian dessert!! Not only does this drink taste good, but it is also considered to be good for our health due to the sabja seeds used in the drink! I also replaced the falooda sev with the bean thread noodles & found that it did not make much difference taste wise! Kate this recipe is for you:) In case you want to make the falooda sev from scratch , just let me know & i will post Mallika badrinath's recipe for you.

Ingredients:

Rose milk syrup - 1/4 cup, cold milk - 1 cup,sabja seeds - 1 1/2 tbsps, soaked for about half an hour , bean thread noodles - a handful, vanilla ice cream - a scoop.

Method:

Add the mung bean threads to boiling water & boil for a minute till they become soft & transparent. Drain & rinse under cold running water & reserve. In the serving cup first pour in the rose milk syrup, then pour in the milk gently down the sides of the cup, add in a tbsp of the cooked vermicelli & 1 1/2 tsp of sabja seeds. Do not stir! Top with a scoop of vanilla ice cream & serve immediately!


Another view of the falooda!;)


ENJOY!!:))
Falooda sev:

Mrs Mallika Badinath's recipe for Falooda sev :

Mix 1/2 cup cornflour very well in 1 cup of water till well blended. Bring the mixture to boil over low heat , stirring continously & continue cooking till it turns into a thick dough. Fill the mixture into idiyappam press & press to form sev into a bowl filled with ice water . The falooda sev must be preserved in the cold water until used.

Kate this one is for you, enjoy:)

2 Comments:

Anonymous Anonymous said...
Wow Paati. Thanks for sharing the yummy recipe. Please do share the recipe for falooda sev when you get time. I will definitely try this soon & get back to you. I have to buy the ingredients this week.

Love,
Kate.
11/20/2008 07:38:00 AM  
Blogger paati said...
dear kate pls just give me a days time & i will post the falooda sev recipe here:)
paati
11/25/2008 02:17:00 AM  

Honeymoon fruit salad!!:))

TUESDAY, JUNE 23, 2009


Honeymoon fruit salad!!:))

Honeymoon fruit salad!!:))
There was this small restaurant 'A'( and the only one where you could go in and eat as a family) in my hometown which served this & it was the most expensive dish on the menu! The salad was served in a HUGE oversizedice cream cup(it really was huge, for i had never been able to finish it even once while i was there!) ! The fruit salad also contained jelly cubes, scoops of two to three different flavours of ice cream & was served with two ice cream wafers struck on each side! I have tried to recreate the recipe based on my memory of this dish!

Ingredients:

Fruit cocktail - 1 can, sweetened condensed milk( Milkmaid) - 1/2 can ( adjust to taste), heavy cream - 1/4 cup, rose milk syrup - 4 tsps, toasted almond flakes - 3 tbsps, toasted cashewnuts - 1 tbsps, orange - 1, raisins - 1 tsp, home made milk ice cream - 1 large scoop, candied cherries - to decorate, nata de coco - a handful, green grapes - a handful (opt), maango - 1, cubed(opt)
Method:
Empty the fruit cocktail alongwith its syrup into a large bowl. Then add the condensed milk , orange segments, grapes, mango cubes & cream, stir till everything is well blended & allow to chill in the refrigerator for about 3 hours. This is the basic fruit salad . You can serve it simply as it is with a scoop of your favourite ice cream , which is what i do whenever i am pressed for time!

To serve:
In an individual ice cream cup, first pour in about 3 ladles of the fruit salad, top with a big scoop of milk ice cream, garnish with almond flakes, cashewnuts, raisins, drizzle 4 tsps of the rose milk syrup & decorate with a candied cherry & serve.


Enjoy!!:))

4 Comments:

Blogger Kay said...
Paati, fruit salad-a? :D Enjoyyy!
6/25/2009 10:25:00 PM  
Blogger paati said...
kay i made this a long time back, before i had to pay attention to what i put into my mouth!;))
6/26/2009 08:34:00 PM  
Blogger Kay said...
Illa paati, saapidarathai pathi sollala. We all make and enjoy what foods we like.

Indha recipe-ku peru fruit-salada apdinnu ore siripu than! :) Fruits taking a nice long, luxurious bath in icecream is more like it! :D
6/26/2009 09:07:00 PM  
Blogger paati said...
fruits taking a luxurious bath in ice cream!:)lol but honestly kay namma ooru-ila fruit salad means with ice cream its understood, but here they serve just some chopped fruits in a bowl & call it fruit salad!!:)
6/27/2009 04:16:00 PM  

Links to this post:

Homemade yogurt/curd/ thair!

TUESDAY, MAY 29, 2007

Homemade yogurt/curd/ thair!


Homemade yogurt/curd/thair!

Making yogurt/curd at home is very easy but the only thing is you have to get hold of some indian curd to use as starter culture! Dont even attempt to make curd with the store bought yogurt, for all that you will end up is with some slimy stringy curd! By making your own yogurt, you can also decide how sour you want your curd to be. For if the yogurt is to be made into thair sadam( curd rice) for dinner, then i just add the starter to the the milk in the morning & by mid afternoon it would have turned into mildly acidic yogurt . But if i need really sour curd,say to prepare rawa idlis then i let it set overnight.

Method:


See the bubbles? it shows that my curd culture is very active!!

Just heat( do not boil, the milk must just be warm) a cup of milk in the microwave & add 1 tbsp of starter to it & stir till everything is well combined .Allow it to sit undisturbed till set. If you keep moving the container after the starter has been added,the curd will separate into whey. I use the milton hot pack(casserole) to set my yogurt. Pour the yogurt culture combined milk into the hot pack & allow it to sit undisturbed till set. The hot pack retains the milk temperature at the same level for a few hours,thereby allowing the yogurt culture to do its job! For if the milk cools down quickly, the starter will be killed!Once the curd is set ,put in the refrigerator until needed.


This batch was allowed to set at around 9.45 am in the morning & by mid afternoon, it had already formed into a mildly tangy yogurt ,perfect for the curd rice for dinner!:)

Ayurveda Health Benefits of Freshly Made Yogurt
Freshly made yogurt is filled with countless numbers of beneficial bacteria that help digestion and kill harmful viruses. The key here is fresh yogurt as compared to commercial store bought yogurt. According to The Council of Maharishi Ayurveda Physicians yogurt that has been sitting on the shelves at the grocery store does not have the fresh active bacteria that homemade yogurt does.
Store bought yogurt is cold, heavy, difficult to digest and can cause the finer channels or shrotas of the physiology to become clogged. Also, once the yogurt has been refrigerated then the quantity of friendly bacteria decreases and thus the health producing benefits are less. Also, from the ayurvedic perspective, it may contribute to weight gain due to the cold and heavy qualities it has.
To gain the benefits of yogurt bacteria choose products that contain live active cultures. If the yogurt has been pasteurized or heated at home, the bacteria are dead and will not provide benefits. Fresh yogurt is especially beneficial for individuals following a vegetarian diet since yogurt adds about 13 grams of protein (1 cup yogurt) as well as B complex, calcium (450 milligrams), potassium, phosphorus, and folic acid. People taking antibiotics (which can destroy lactic flora) are often advised to eat yogurt to replace the healthy bacteria. Fresh yogurt is digested in about one hour as compared to the three hours it can take to digest milk. Individuals who have trouble digesting milk may find that fresh yogurt is much easier to digest and actually aids in their digestion as well.
Homemade curd /yogurt/thair!!
Other health benefits from fresh yogurt include decreased bloating, relief of both constipation and diarrhea and other stomach disorders. Ayurveda recommends taking yogurt in the form of a drink known as lassi. This makes the yogurt even more light and digestible and helps in intestinal comfort after eating a meal. Ayurveda recommends making a batch of fresh yogurt to be consumed each day. According to ayurveda, yogurt should not be combined with milk or cream. Yogurt is the only "fermented" food recognized as saatvic by ayurveda. Yogurt, as a sour taste, is good for balancing Vata, but should be reduced by people on a Pitta or Kapha balancing diet.
(From the maharishi ayurveda site)

4 Comments:

Blogger Kay said...
Paati, do you know about yogourmet? freeze dried yogurt culture that you can use to start your yogurt at home. I read about it first on Jugalbandi that it makes awesome Indians tyle ketti thayir.. Check it out..

I will try mine today and let you know how it goes once the thayir comes out.
10/21/2008 08:56:00 PM  
Blogger paati said...
yes kay, i have the yogurt maker & i have made the yogurt & keffir at home with the starter( powder) quite a few times at home. Personally i found the keffir made with the starter to be more close in taste to namma ooru thayir. If can get hold of turkish yogurt , do get it & use it to make curd, you will get perfectly well set sour indian curd every time. The turkish yogurt will be very thick almost like our amul dahi, but tangy like our local curd, ask for it in turkish grocery stores , & you will never miss our indian curd:) works out cheaper too than the starter kits!
paati
10/21/2008 11:22:00 PM  
Blogger Kay said...
Great, thanks Paati, will check it out!
10/21/2008 11:35:00 PM  
Blogger paati said...
you are welcome kay:)
10/21/2008 11:37:00 PM  

Vadouvam made from scratch!

SUNDAY, JULY 01, 2012

Vadouvam made from scratch!


Vadouvam made from scratch!
Though i get my yearly stock of vadavoum from my amma, this year i have decided to try it out at home and moreover i have got to use the dehydrator which is gathering dust in the cupboard!!


 Had bookmarked menaga's recipe a longtime back, but only now i got around to trying it out in my kitchen! I will upload the photos later on . Thanks Menaga for sharing such a traditional recipe.
Ingredients:
Pearl onions - 2 kgs ( i have used these), turmeric pwd - 50 gms, mustard seeds - 100 gms, urad dal -100 gms, fenugreek seeds - 100 gms, salt - 1/2 kg, garlic - 3/4 kg, cumin seeds - 100 gms, curry leaves - a bunch ( one kothu), nal ennai or castor oil - 50 gms.
Method:
Peel the onions and blend just once ( coarsely) in the mixie and tranfer them to a large plastic box or clay vessel. Rinse the mixie jar with a little water and add to the crushed onions. Now add the turmeric and salt  ( only if it is very salty , it will not get spoilt) and mix well . Close the box and let rest at room temperature for 2 days.


On the third day, add the mustard, urad dal, fenugreek, cleaned curry leaves, garlic crushed with their skins on and mix well and allow to marinate thus for another 2 days.
After 2 days, take the onions out, squeeze out all the water, shape into balls & dry on a plastic sheet. In the evening put the onions back into the same water left in the box.
Continue this process , ie: shaping into balls, drying and putting it back into the water, until all the water has dried up.
When the onion is completely dry ( it should be pola pola endru) to touèch, add the oil, mix and shape into balls and store in an airtight jar.
Vadouvam started on 1/7/ 12


Finished vadouvam  10/7/12
Updated on 10/7/12:  I added a little more oil than what she had said, but i was still unable to form balls  like the traditional vadouvam. And moreover my vadouvam was a bit crispy, since i had dried it like  said in the recipe, 'pola pola' ! 

 Vadouvam kari with my homemade vadouvam!:)


My amma says that maybe i am unable to form balls, since i had dried it in my dehydrator and not outdoors! Will use it tomorrow to cook some vadouvam kari and will let you know about its taste ;)

Vadouvam kari with my homemade vadouvam!:)
  
Verdict: The vadouvam was very aromatic when fried and also tasted good in this vadouvam kari , which is a speciality of my hometown!:) But just be careful with the salt, since the vadouvam is already very salty .

HOORAY!!! I can now use vadouvam to my heart's content in my cooking without having to worry about my depleting stock of vadouvam!!:)) 

Homemade yogurt with semi skimmed milk in yogurt maker

MONDAY, JULY 29, 2013

Homemade yogurt with semi skimmed milk in yogurt maker


Homemade yogurt with semi skimmed milk in yogurt maker
From the time i started using my yogurt maker to prepare yogurt at home, i was always using full fat milk with a tiny amt of milk pwd thrown in to get thick and creamy yogurt. Then it struck me as to why not use the semi skimmed milk and just increase the amt of milk pwd to prepare the yogurt! So tried it once, and now yogurt at home is ALWAYS made with semi skimmed milk , but on tasting it you would never know the difference for the end product as usual is thick and creamy. The Poor eater just loves having this yogurt with my homemade chunky apricot and mango jam.  I also normally prepare the yogurt at night at around 9 o clock and the next day it will be perfectly set.
Ingredients:
Semi skimmed milk ( room temperature) - 1 litre, plain yogurt - 2 jars, skimmed milk pwd - 10 heaped tbsps.
Method:
Take the milk and  milk pwd in a bowl and mix well. Then MWave the mix for 30 secs. Now add the plain yogurt and mix well until everything is well combined. Pour the mixture into the glass jars and place ( uncovered)  in the yogurt maker. Close the yogurt maker with its lid and switch it on. The next day cover the jars with their lids and refrigerate.

Enjoy!:))

Ginger - garlic paste made the retro way!:)

SUNDAY, JULY 07, 2013


Ginger - garlic paste made the retro way!:)


Ginger - garlic paste made the retro way!:)
My Preethi mixie had died the other day. At first i was feeling a bit lost without my mixer grinder, but then i remembered this small ammi kal that my sister had got me from one of her trips to mahabalipuram. So used this to grind some ginger - garlic paste. After 10 mins, i was rewarded with thick ginger - garlic paste ( about 2 tbsps each).

Ginger paste being ground

Garlic paste being ground


Then i couldn't help grinding some thick red oconut chutney to have with my idlis! Okay, i got around just 1 tbsp of chutney! But the taste sure made up for the quantity!:)

2 Comments:

Blogger Karthika said...
Wow... Ammikal. I bet the dishes tasted awesome with ammikal ground GG paste. I think I should try it with guacamole stone thingy we bought recently.
7/11/2013 09:29:00 PM  
Blogger paati said...
and not to forget that it is a very good exercise to tone our upperarms!;)))as for the taste, the chutney tasted super good,reminded me of my childhood days watching the maid grind the chutneu for breakfast:)
7/12/2013 05:03:00 PM  

Homemade probiotic yogurt with my yogurt maker

SUNDAY, JULY 28, 2013


Homemade probiotic yogurt with my yogurt maker


Homemade probiotic  yogurt with my yogurt maker 
It had been more than a decade that i had bought the yogurt maker, but it was gathering dust in the cupboard . For after the initial excitement, it was reput  in its box and arranged out of sight! But now with the rising ACTIVIA price, i was tempted to give it a try, for at home our weekly one kilo pack of yogurt gets over very quickly and come friday, there will be just one or two cups left! Once the initial batch was made and tasted, there was no going back:)) The Poor eater has now become a big fan of my homemade  yogurt served with a  dollop of my homemade jam!! Infact i have started making yogurt twice a week , for it gets over quite quickly:)

The starter is available in pharmarcies. Though you will have to ask for it, since it has to be refrigerated. Milk pwd is normally used to thicken the yogurt , for otherwise even with full fat milk the set yogurt might not be too thick. But when milk pwd is added to the milk, the set yogurt will be thick like custard, you can almùost turn the bottle upside down safely, something you cannot do with the storebought Activia yogurt. It is only for the first batch that you use the starter and from the second batch onwards you can use a jar of the previous batch as the starter. I normally use the last two jars from the previous batch as starter for the next batch.


Ingredients:
Whole milk ( full fat milk) - 1 litre, starter powder - 1 vial, milk pwd  - 3 heaped tbsps.


Method:
Take 1/2 cup of milk ( room temperature) from the one litre of milk and stir in the starter and mix well. Cover and let rest at room temperature for 1/2 hour. This is done to activate the starter. Now take the rest of the milk ( room temperature) and milk pwd in a MWave safe bowl and MWave for 30 secs. Then add the starter mixed milk and mix well. Pour into the glass jars and place uncovered in the yogurt maker , cover with the glass lid and switch on the machine. The next day the yogurt will be set like thick custard. Cover the jars with their lids and refrigerate.


Enjoy the homemade probiotic yogurt with live good for you yogurt cultures!!:))

4 Comments:

Blogger Karthika said...
Wow yogurt maker....Chumma ovenla light potu if you leave the pathram, yogurt set aagatha??

We leave it in the oven with light On in winter, in summer yogurt sets well when left outside.

Quite interesting, will read about yogurt maker. I am assuming it kinda maintains temperature to ease yogurt making process.
8/14/2013 11:34:00 PM  
Blogger paati said...
Karthika the yogurt maker maintains a constant temperature till it is set.Adhulaiyum mine is a very old model with just a button , automatic seb model which was supposed to be latest when i bought it!!:)), nowadays you have models with temperature control and time setting. Karthika if you love sweet yogurt, try the vietnamese yogurt which tastes almost like custard.
8/14/2013 11:49:00 PM  
Blogger Kitchenmate said...
Paati,
Super.. Orey recipes mazhai than...
I maket at home albeit the yogurt maker, i am curious about adding dry milk powder. I use 1% milk, boil on stove until it boils. Cool it to luke warm, then add the urai thaiyir, then same as karthika said.
If I am going to add milk powder, when do I add that? Before boiling or after cooled?
Now i am starting to buy fat free greek yogurt coz read it is healthy and help with the PMS(really, i wonder)...
8/20/2013 03:14:00 AM  
Blogger paati said...
Kitchenmate the milk pwd is to thicken the yogurt which sets almost like thick cream. I take milk ( rom temperature), milk pwd , stir & MWave for 30 secs and then add the starter yogurt, stir well and place it in yogurt maker. milk pwd is always before boiling milk for otherwise it doesn't dissolve that easily.
the recipe mazhai is because it is summer HOLIDAY , just one more week & it is back to school stress!;)
8/21/2013 08:22:00 PM